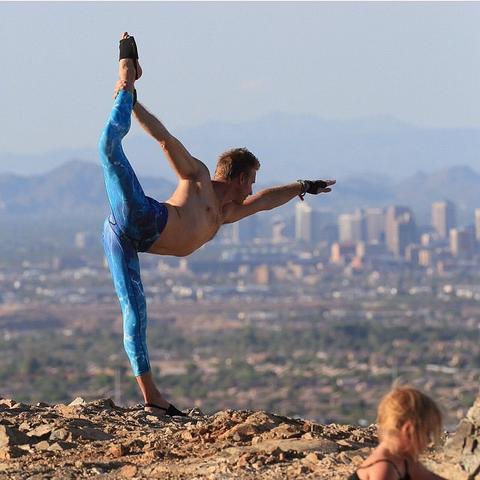
 How much does fear hold you back from becoming all that you want to be? For many people, concerns about failing—or, sometimes, succeeding—keep them inside a comfort zone they’ve outgrown. They repeat the same routine, the same job, even the same yoga poses because they’re afraid of how well they’d cope with a new situation. Somewhere along the line, people have lost the idea of what learning is all about. If they don’t think they can “get” something the first time or make a huge success of a new relationship, a new job, even a new restaurant experience, they feel they’ve failed.
Learning and trying are the true opposites of failure. In the process of facing down your fears and exploring new things, you open up new ways of looking at yourself. Just taking the first step toward mastering a new pose or breaking out of your own box is a vote of confidence in yourself. By just committing to trying, you’re telling yourself that you think you can get where you’re going. And the best part is that, without fear clouding your vision, you’ll probably see more possibilities as you progress toward your goals
Quieting your fears is essential to enjoying your life and living your own truth. The sixth Yama, Dhriti (Steadfastness) focuses on the importance of overcoming fear and inconstancy. If you’re always fearful, you’ll be tense, reactive and “small.” Yoga, which is a metaphor for living, gives you a powerful foundation for battling your fears. Arm balances could be a good starting part for launching into your fearless life. Yes, they’re challenging. But, they’re also fun. They require time, patience and an understanding of your body. They also require that you put down your preconceptions and go with the flow.
For many students, it comes as a surprise that arm balances aren’t just about having a strong body. For many of them, you also need flexibility and balance. Achieving the more difficult arm balances is more about relaxing and softening into the poses than just gritting down and holding.
So the next time you go to class and the instructor is moving the class toward Bakasana (Crow or Crane), don’t panic. Let yourself enjoy the idea of learning something new, of playing in your own body. Here’s a sampler of poses that are all about reinforcing a “go for it” approach to today and tomorrow:
 |
Utthita Chaturanga Dandasana (Plank Pose)Benefits: This pose forces you to engage your arms and your core, which are crucial for succeeding in more advanced arm balances. How to do it: Start in Adho Muka Svanasana (Downward-Facing Dog Pose). Gradually roll your torso forward until your shoulders are over your wrists and your body forms a straight line from head to toe. Hold the pose for 30 seconds to one minute. For a challenge raise one leg in the air for 30 seconds each.
|
 |
Astavakrasana (Eight Angle Pose)Benefits: This challenging pose helps you to find your strength and learn to feel in control without your body in symmetry. How to do it: Begin in Tadasana (Mountain Pose) with your feet slightly wider than normal. Fold forward. With your knees slightly bent, place your right hand on the ground slightly outside of your right foot. Slide your right leg across your arm until your knee rests on the back of your shoulder. Bracing your shoulder against your leg, shift your leg to the right, eventually crossing your ankles. Then bend your arms, lean your torso forward and keep your gaze down. If you can, straighten your legs, hugging your right arm. Hold for 30 seconds to one minute, then uncross your ankles and release to a forward fold before repeating on the other side.
|
 |
Tolasana (Scale Pose)Benefits: Unlike many arm balances, this pose doesn’t have an inversion component, allowing you to feel your balance from a more natural perspective. How to do it: Start in Padmasana (Lotus Pose). You may want to place blocks under your hands. Press into your palms to lift your hips off the ground. Remain in the pose for 15 to 20 seconds, then release and repeat with your legs crossed the opposite way.
|
 |
Parsva Bakasana (Side Crane Pose)Benefits: The back-bending required in this pose helps to counteract the tightness you might feel in your shoulders after working on arm balances. How to do it: Squat down until your thighs are parallel to the ground. Place the outside of your left leg on top of your right arm. With a slight backbend, slide your arm as far under your legs as possible. Continue the pattern of twisting and releasing until you reach your most complete rotation. Move your left arm toward your right knee, focusing on keeping the skin of your arm rotated outward. Bend your knees into a full squat. Place your left hand on the floor. Begin to transfer your weight until you can also place your right hand on the ground. Pull your body to the right until the center of your body is between your hands. This might not be the perfect balance point for you, but it should put you close enough that you can feel your way toward it. On an exhale, lift your feet, stretching your left arm as much as possible. Hold for at least 20 seconds, then repeat on the other side.
|
|
|
Eka Pada Koundinyasana I (Split-Leg Arm Balance Pose)Benefits: This pose helps to strengthen your wrists, arms, and core. How it's done: Begin in standing pose, bend knees down into a deep squat, knees together. Twist to the side, place hands on the floor, shoulder-distance apart, and fingers pointing forward. Lift hips and move knees to left elbow into side crow pose. Extend upper leg straight behind you, and bottom leg straight out to side |

The best part of yoga is that there’s no scorekeeper, not points for getting a pose first time or even over your lifetime. Yoga is all about the journey, so start on your path with confidence. Each time you take a mental, physical or spiritual step, you’re moving closer to full self-awareness. Enjoy the trip!
Bonus Pose!
 |
Pincha Mayurasana (Peacock Feather Pose)Benefits: This inversion stimulates blood flow to your head, strengthens your shoulders, and promotes core balance. How to do it: Start in table pose, move down to your forearms. Move into Dolphin Pose. Begin moving your feet towards your elbows. Keep your elbows in line with your shoulders. Keep your gaze towards your hands. Lift one leg up, keep it straight. With the other leg, begin to hop, moving your body into position until straight leg is vertical. Eventually, you won't need to hop, and your legs will lift into place gracefully. Once the opposing leg is vertical and the core is balanced, bring both legs to vertical. Repeat on the other leg.
|